Connection lost
Trying to reconnect…
Server didn't respond
Recovering…

Connect an LLM
emisar exposes your runners and their action catalog as a Model Context Protocol server. Two ways to plug an LLM in:
- Remote MCP (Claude.ai, ChatGPT Apps, recent IDE clients) — paste one URL. emisar signs you in over OAuth; there is no API key or header to manage. This is the only way the cloud connectors work — their setup form has a URL field and nothing else.
-
Stdio bridge or static key (Claude Desktop,
Claude Code, Cursor, Codex CLI, Gemini CLI, plain HTTP) — a tiny
binary on your machine, or a raw bearer token, authenticated with
an
emk-API key.
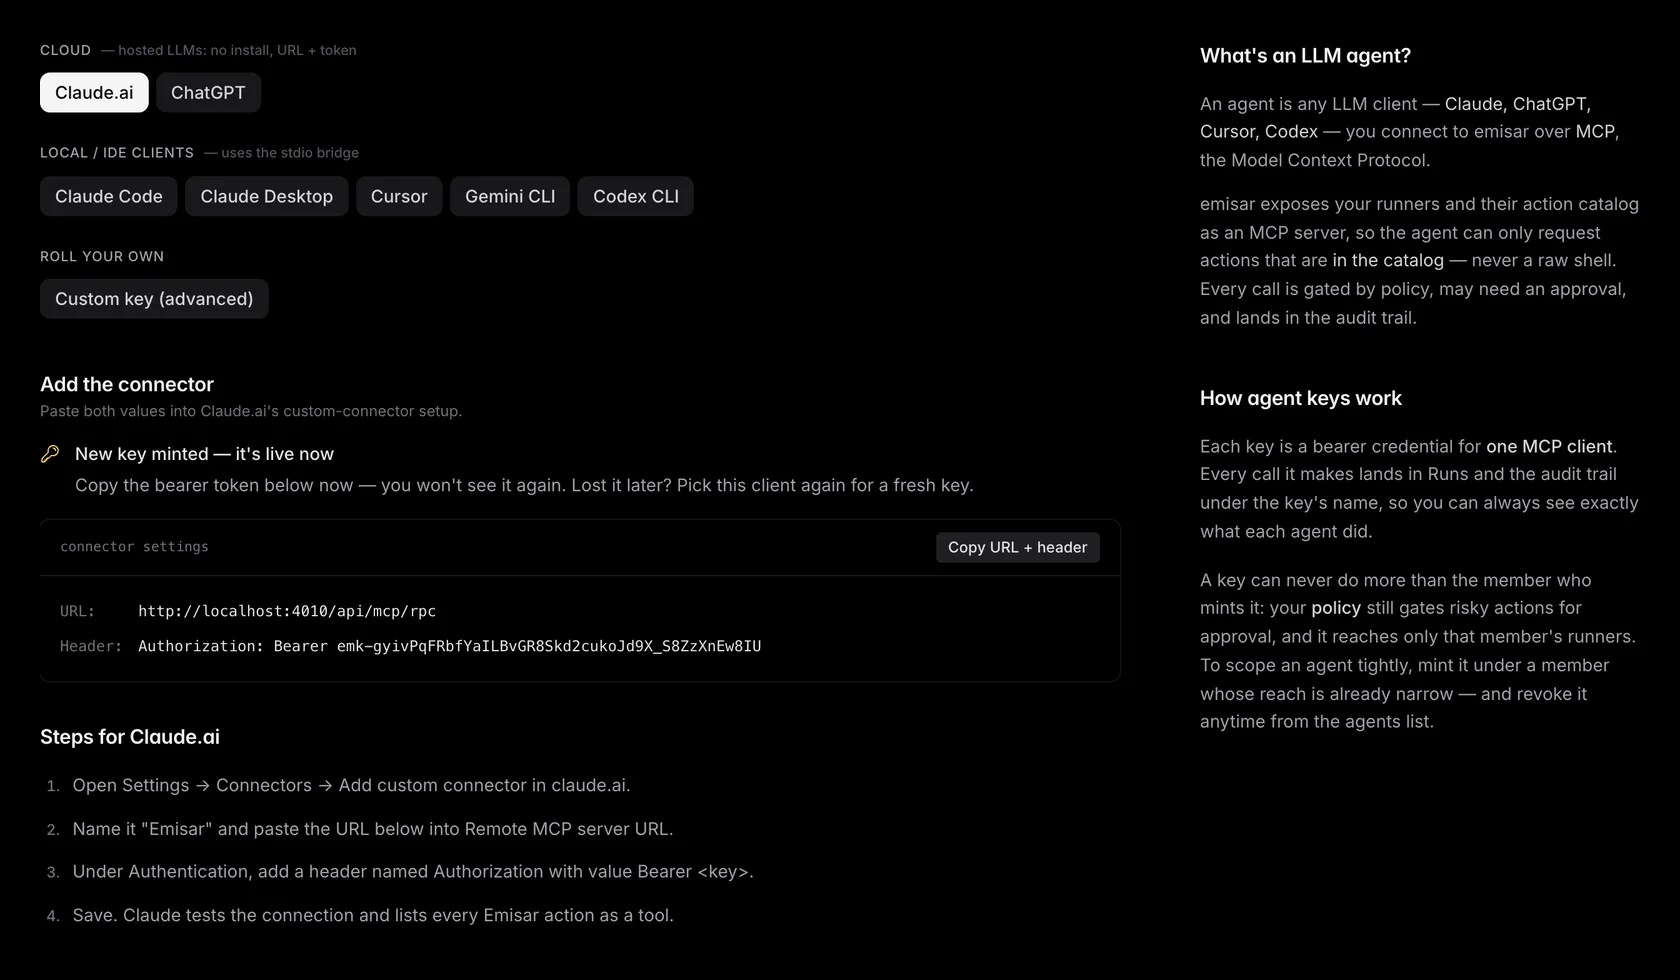
Connect a cloud LLM (recommended)
Claude.ai and ChatGPT Apps only need a URL — no header, no token field. emisar is a full OAuth 2.1 authorization server, so the connector discovers it from that URL, registers itself automatically, and sends you through a one-time emisar sign-in. The single value to enter:
https://emisar.dev/api/mcp/rpc
Claude (claude.ai)
- Open Settings → Connectors (on Pro/Max it's Customize → Connectors).
- Click + → Add custom connector.
- Paste the Remote MCP server URL above into the URL field.
- Leave Advanced settings (OAuth Client ID / Client Secret) empty — emisar registers your client for you via Dynamic Client Registration. Click Add.
- Claude opens an emisar tab. Sign in, review what the connector is asking for, and click Authorize. The connector flips on.
- Turn it on for a chat: the + button (lower-left of the composer) → Connectors → toggle emisar.
Team / Enterprise: only an Owner can add the connector, under Settings → Organization settings → Connectors → Add → Custom → Web. Members then open Customize → Connectors and click Connect to run the same sign-in.
ChatGPT
ChatGPT now calls custom MCP connectors apps. Developer mode exposes the app-creation flow for your own MCP server. Available on Plus, Pro, Business, Enterprise, and Education.
- Enable it once: Settings → Apps & Connectors → Advanced settings → turn on Developer mode.
- Open Settings → Connectors and click Create.
-
Fill the form:
-
Connector name
—
emisar - Description — e.g. "Run approved infrastructure actions on my fleet."
-
Connector URL
—
https://emisar.dev/api/mcp/rpc - Authentication — choose OAuth
-
Connector name
—
- Click Create. ChatGPT sends you to an emisar sign-in → Authorize. If ChatGPT shows a token or header field, switch the authentication type back to OAuth.
- Use it from a new chat: click the + button near the composer, choose More, then select emisar. Seeing actions in settings only proves ChatGPT fetched metadata; this step adds the app to the conversation context so the model can call it.
- After changing emisar's tool metadata, open the connector in settings and choose Refresh before testing again.
ChatGPT connects to remote HTTPS MCP servers only — there is no stdio option. The emisar endpoint is already remote, so nothing extra to host.
What the sign-in grants
The consent screen mints a key bound to your membership. The connector can only run actions your policy already permits, every call is attributed to you in the audit log, and anything needing approval still waits for a human. Revoke access any time from LLM agents in the dashboard, or from the connector settings in Claude / ChatGPT.
Mint an API key (desktop, CLI & HTTP)
The clients in steps 3 and 4 authenticate with a raw key instead
of OAuth. In the dashboard sidebar, click LLM agents.
Pick your LLM client from the tab strip — we mint a key named
after it and drop a prefilled snippet you can paste into the
client's config.
The key itself carries no permissions to tune — what it may run is your account policy (risky actions pause for approval), and which runners it can reach is the runner scope of the member who mints it (set on the Team page). To hand one agent a tighter blast radius, mint it under a member whose runner scope is already narrow. A separate read-only audit-export token — minted on the audit page — ships the audit log to a SIEM and can never execute an action. The dashboard reveals the raw key once; copy and store it.
The cloud connectors in step 1 do not need an API key — they authenticate with OAuth. Mint a key only for the stdio bridge or plain-HTTP clients below.
Desktop & CLI clients (stdio bridge)
For clients that only speak stdio MCP — Claude Desktop, Claude
Code, Cursor (local mode), Gemini CLI, Codex CLI — install the
tiny emisar-mcp
binary. It's a thin shim that forwards stdio JSON-RPC frames
to the same /api/mcp/rpc
endpoint.
Every MCP semantic — tool descriptors, content blocks,
wait_for_run
— is implemented in the portal,
so the bridge stays version-locked to the spec without you
redownloading it.
Install
One-liner — auto-resolves the latest
mcp-v*
release, verifies sha256, drops
emisar-mcp
into /usr/local/bin:
$ curl -sSL https://emisar.dev/install-mcp.sh | sudo bash
Rather verify first? The bridge release carries SLSA provenance + a
SHA256SUMS-MCP
checksum file — see Release integrity.
Or go install
(Go 1.26+):
# go install drops the binary at ~/go/bin/mcp; symlink it as emisar-mcp:
$ go install github.com/andrewdryga/emisar/mcp@latest
$ sudo ln -sf ~/go/bin/mcp /usr/local/bin/emisar-mcp
Claude Desktop
Add to ~/Library/Application Support/Claude/claude_desktop_config.json:
{
  "mcpServers": {
    "emisar": {
      "command": "/usr/local/bin/emisar-mcp",
      "env": {
        "EMISAR_URL": "https://emisar.dev",
        "EMISAR_API_KEY": "emk-..."
      }
    }
  }
}
Restart Claude Desktop. Tools appear under the tool icon as "emisar".
Cursor
Same bridge. Cursor reads ~/.cursor/mcp.json:
{
  "mcpServers": {
    "emisar": {
      "command": "emisar-mcp",
      "env": {
        "EMISAR_URL": "https://emisar.dev",
        "EMISAR_API_KEY": "emk-..."
      }
    }
  }
}
Recent Cursor builds also speak remote MCP — point them at
/api/mcp/rpc
directly (step 1) if you'd rather skip the bridge.
Claude Code
One-line register, user scope (every project):
$ claude mcp add emisar /usr/local/bin/emisar-mcp \
    --scope user \
    -e EMISAR_URL=https://emisar.dev \
    -e EMISAR_API_KEY=emk-...
Verify with claude mcp list.
Gemini CLI
Add to ~/.gemini/settings.json:
{
  "mcpServers": {
    "emisar": {
      "command": "/usr/local/bin/emisar-mcp",
      "env": {
        "EMISAR_URL": "https://emisar.dev",
        "EMISAR_API_KEY": "emk-..."
      }
    }
  }
}
ChatGPT Codex CLI
Add to ~/.codex/config.toml:
[mcp_servers.emisar]
command = "/usr/local/bin/emisar-mcp"
env = { EMISAR_URL = "https://emisar.dev", EMISAR_API_KEY = "emk-..." }
Targeting a signed-dispatch runner?
If a runner enforces signed dispatch, add
EMISAR_SIGNING_KEY
and EMISAR_SIGNING_CERT
(printed by emisar signing init)
to the same env
block — the bridge signs every call so an enforcing runner will run it. Keep both secret,
never on the portal. The cloud connectors in step 1 sign nothing, so they can't reach an
enforcing runner.
Plain HTTP / your own agent
Same auth, same data, REST-shaped. Use these when wiring a
custom agent (OpenAI tool calling, internal automation,
generic curl) with an emk-
key from step 2.
# Try it from a shell — should return the tool list.
$ curl -X POST https://emisar.dev/api/mcp/rpc \
    -H "Authorization: Bearer $EMISAR_API_KEY" \
    -H "Content-Type: application/json" \
    -d '{"jsonrpc":"2.0","id":1,"method":"tools/list"}'
-
GET /api/mcp/runners— runners + the actions each advertises. -
GET /api/mcp/tools— one entry per distinct action with full JSON Schema input descriptor. -
POST /api/mcp/tools/:action_id?wait=15s— fire-and-forget or long-poll dispatch. -
GET /api/mcp/runs/:id?wait=60s— fetch result; long-poll for pending approvals.
For OpenAI tool calling: pull /api/mcp/tools,
forward each entry's
inputSchema
as a function parameter schema, and POST the model's chosen
arguments back to /api/mcp/tools/:name?wait=30s.
Every dispatch must include a
reason
— it's logged to the audit trail and shown to approvers — and an
Idempotency-Key
header makes a retry at-most-once.
Point your agent at real infrastructure — safely.
Set up a runner first, then connect Claude, ChatGPT, or Cursor to your account's MCP endpoint and let policy decide what runs.
Three runners. Seven-day audit. No credit card.